It is Thursday morning of NextStep 2019 in Denver. I am doing some last-minute preparations for my Lightning Talk “OutSystems Tricks & Tips for Complex UI Integrations”, based on my article of the same name.
The day before, OutSystems had publicly released their new Reactive Web Applications — the new and improved version of Web Applications which is built on ReactJS. On a whim, I decided to open up a new Reactive Web App in my personal environment to see how much of my talk would still be relevant with this new Web App framework. To my horror, I realized that essentially none of my tips worked in this new version!
I go ahead and give my talk, knowing there are plenty of OutSystems Web Apps that will be maintained for years to come that could use the advice. I also focused on the idea of thinking outside the box, there is almost always a way to achieve your UI goals inside of OutSystems if you are creative enough.
That all said, I think it's time for the sequel. Let's talk about getting the new Reactive Web to do whatever you want it to.
Creating HTML Elements
Goodbye OSTagName and hellooooooo “HTML Element”.
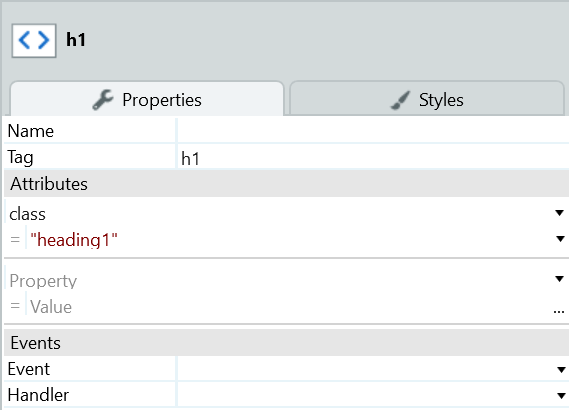
With the move to Reactive web, OutSystems has removed the ability to convert the element type of Containers and other widgets in exchange for adding an “HTML Element” widget.
With “HTML Element” you are able to add (almost) any valid HTML tag into your code. Simply add the widget and set the “tag” parameter to the needed tag.
This has some limitations that OSTagName did not have. You MUST use a valid HTML tag, and the tag is not dynamic, it must be specified at build time. Most of the time this should be fine, and still allow you to build out a more correct HTML structure where needed. This lets you better follow accessibility standards for page structure, as well as use CSS frameworks designed around traditional HTML.
OutSystems and JavaScript
OutSystems and JavaScript are now much better friends than they have been in the past. JavaScript is integrated into the platform in a much more organic way, it does not feel as tacked on as in the old Web App experience. This means you don’t have to work as hard to integrate with JavaScript!
Let's take a look at some of the ways you can take advantage of this.
Trigger an OutSystems Action from JavaScript
In my last article on OutSystems UI integrations, I mentioned that there was no native way to call an OutSystems action from JavaScript and cheekily linked out to an Idea I had submitted to add this functionality.
Well, they implemented it baybeeeeee! I will take full credit for this addition because of my idea (with its whopping 10 likes), I’m sure it was not simply in the roadmap.
So that all being said, let’s talk about this. When you open a JavaScript editor, one of the things available to you are Screen Actions. They operate as a JavaScript function call.
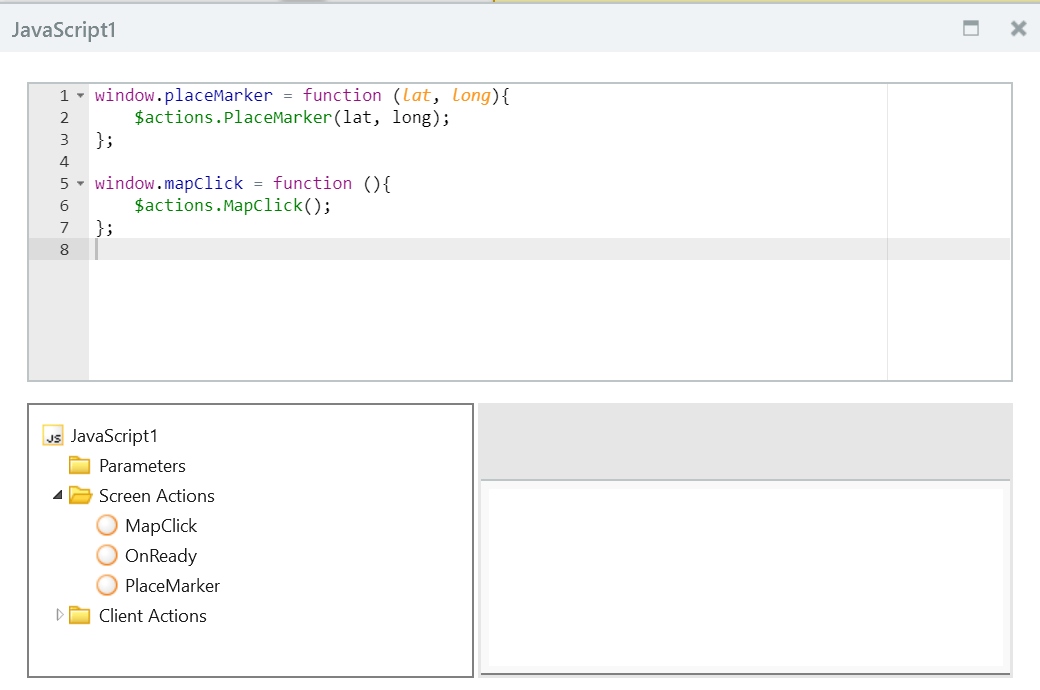
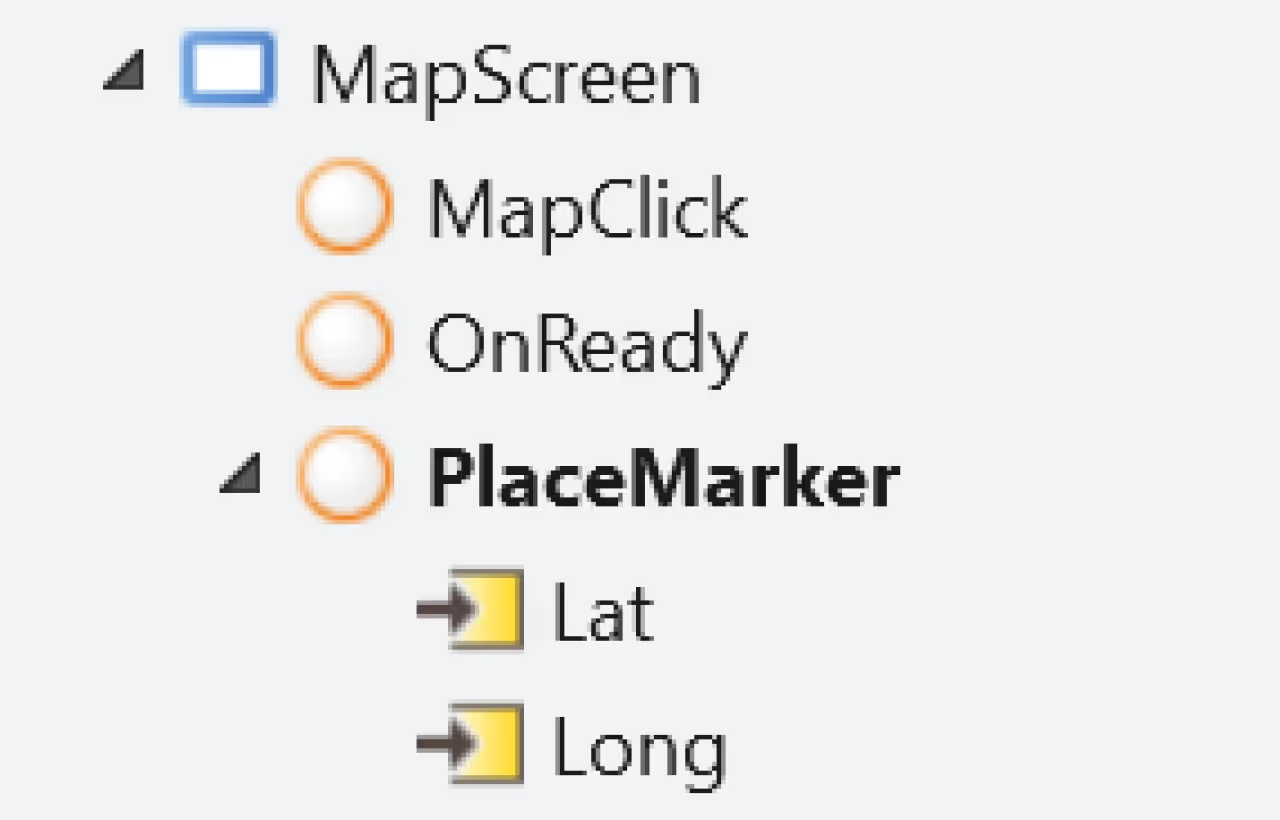
If you have a Screen action with input variables, simply pass them to the action like any other function, in the order the Input Variables are listed.
In this example, I have assigned both of these Client Actions to functions available anywhere on the page. This allows me to easily use them with integrations and JavaScript libraries. Of course, the Client Actions can still be accessed directly at time of use as long as it is from a JavaScript editor window.
Transfer information from JavaScript variable to OutSystems and Vice Versa
Now that OutSystems actions can be called from JavaScript, this is an easy solution. If you need to assign the value for an OutSystems Local Variable from JavaScript, simply create a setter action for that Variable with an assign setting the variable.
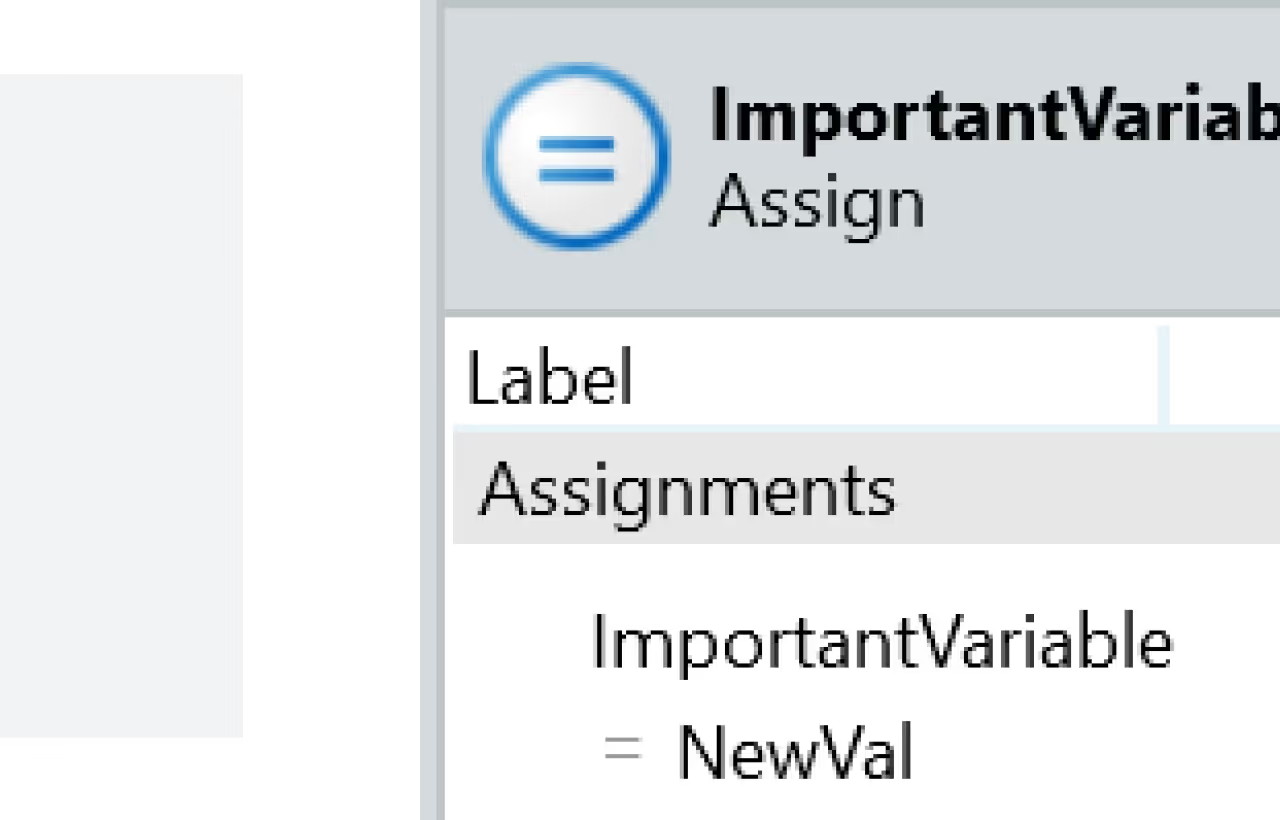
Then from JavaScript, call that action with the method described above.
var integrationReturnValue = integrationCall();
$actions.SetImportantVariable(integrationReturnValue);
To go the other direction, it is just as simple as running a JavaScript node, passing in your variable and setting it to the intended JavaScript variable.
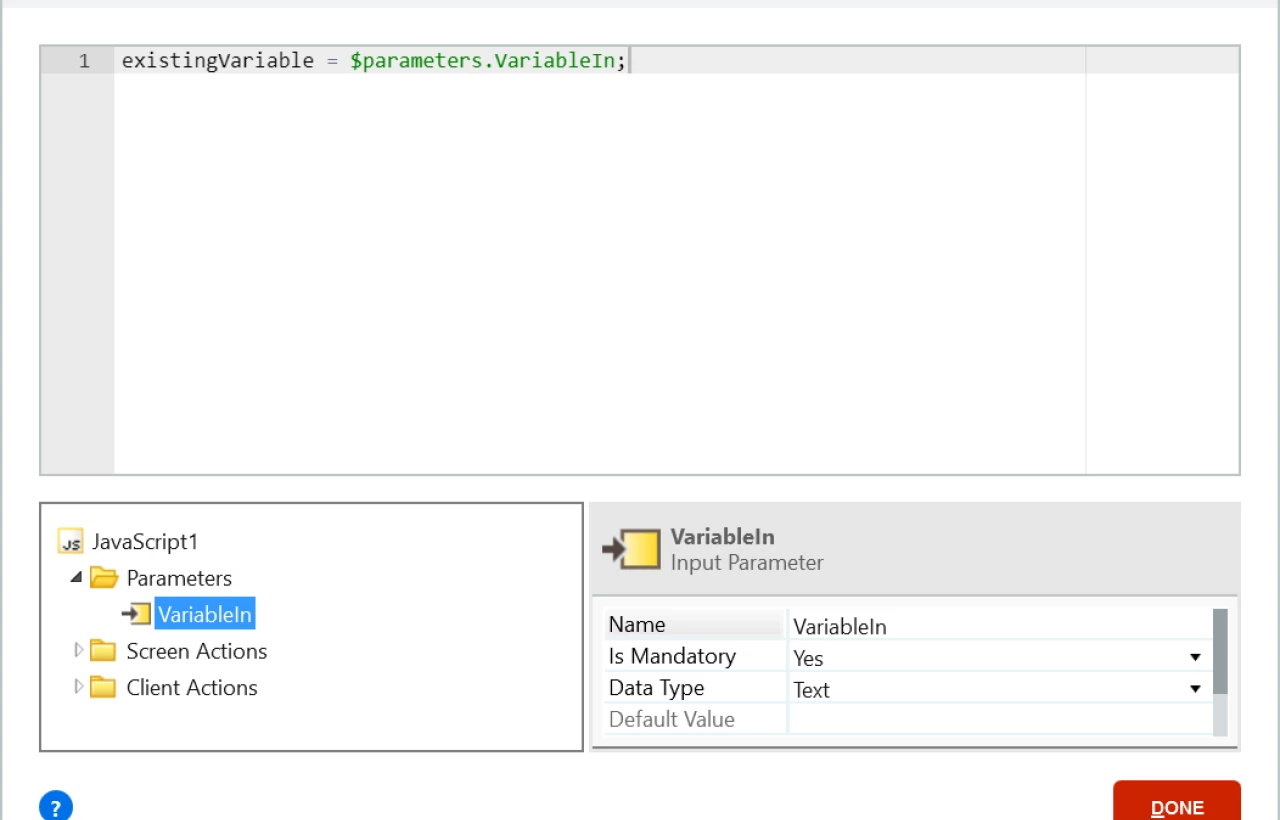
Other UI Fixes
This is where I have to give a moment of silence to Non-Escaped Expressions. Goodnight, sweet prince. You will be missed.
In the new Reactive Web, the page structure is much more tightly controlled through ReactJS, meaning some concessions had to be made in how much the code of a page can be altered. However, we still have some flexibility here, we just have to be more creative.
With JavaScript, the HTML of a given container can be altered with the .innerHTML command. To create a Block that does exactly that, simply add one container to the Block with a name, create an OnRender action for that Block with a JavaScript action inside it which sets the .innerHTML of the container. This can be used to dynamically add HTML or CSS to a page easily. Note that you should not use this for dynamic JavaScript, instead use OutSystems new built-in JavaScript support.
I created a Forge Component that demonstrates this concept, and will definitely be using it when I need some extra flexibility in the future.
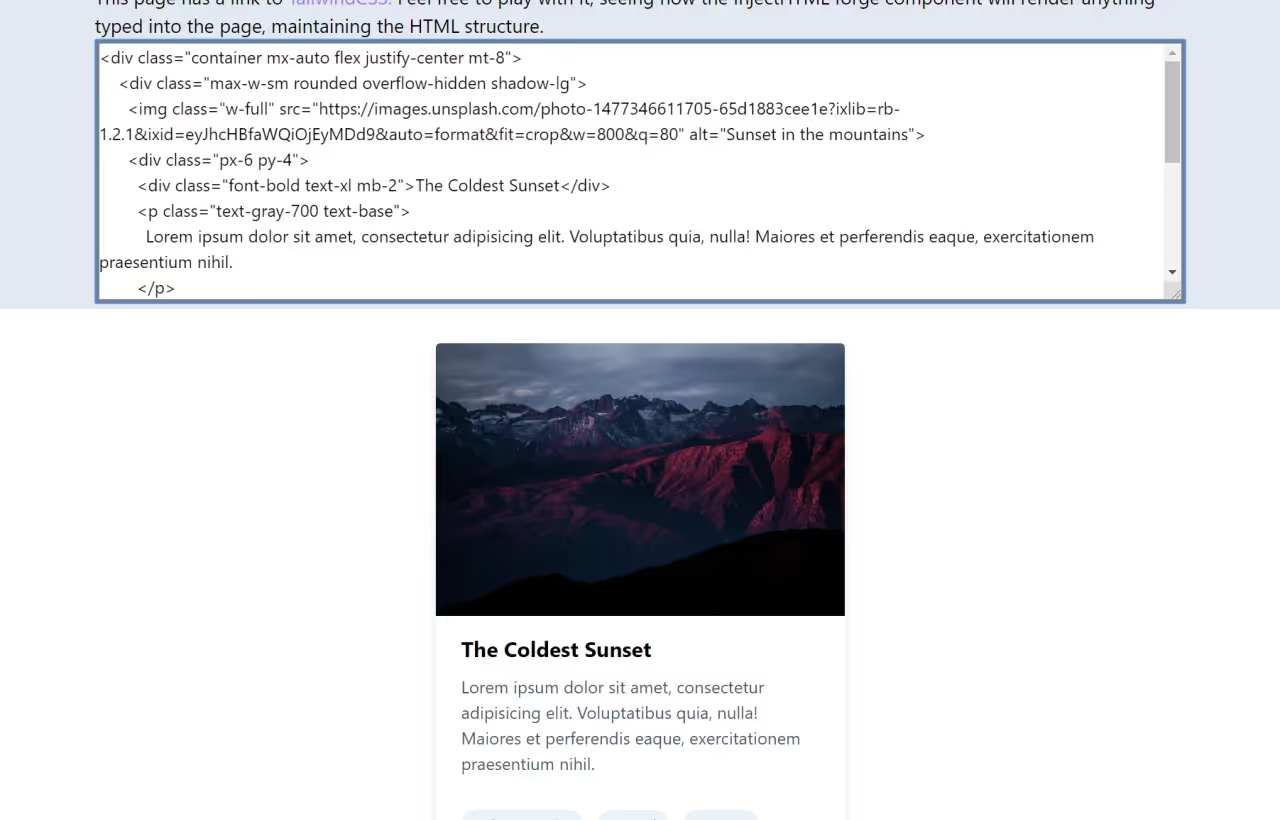
Overall, the transition to the Reactive Web is a huge step in the right direction for OutSystems. It is an absolute joy to see how responsive the pages are now making use of an industry-standard JavaScript framework. I will miss my Non-Escaped expressions, but the pros very much outweigh the cons.
I hope you take this article as a charge to keep thinking outside the box. OutSystems is a powerful platform, but every now and then when you run into something that doesn’t quite work the way you want it to. I can assure you that with enough ingenuity, you can find a solution.


